
Total Time: ca 1 hour
Materials:
- Padlock
- Mod Podge
- Permanent Marker
- Scissors
- Paint brush
- Fabric
A few tips beforehand:
- I used Sparkle Mod Podge because this is the only kind of Mod Podge i have *sad face*, but i think you can use any other formula as well.
- a solid cotton-like fabric seems to work best. I tried satin at first, but it was too flimsy and did not stick well
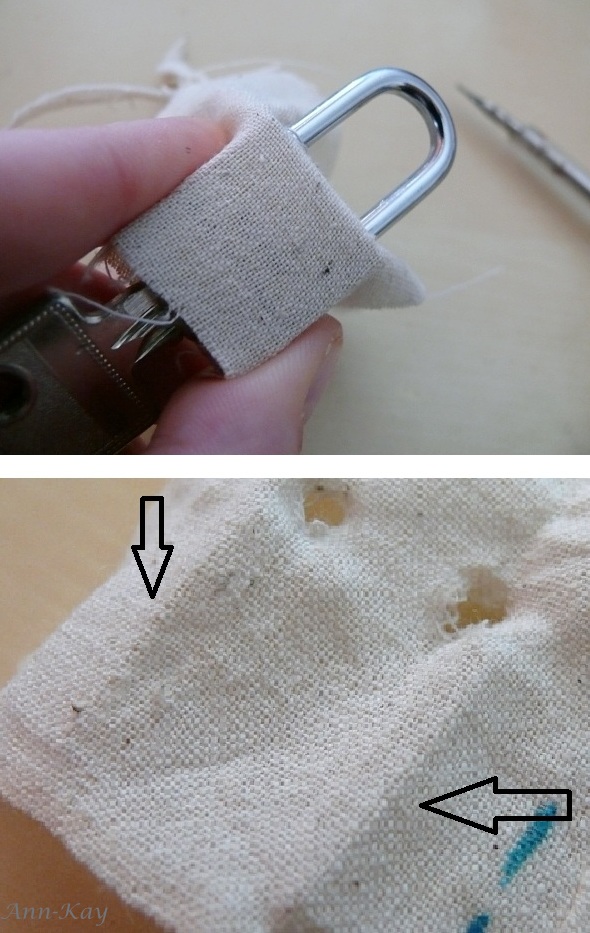
- test your marker on a non-visible part of the fabric before you start. As you can see in photo below i wanted to use a turquoise marker, but it blurred and i had to use another one.
Instructions: ( it's a bit difficult to explain, but i hope the description is halfway coherent nonetheless)
1. First cut a small piece of fabric, a bit larger than twice the size of the lock

2. Cut a tiny hole into the middle of the fabric and insert the shackle of the padlock
3. Now push down the shackle as far as possible to mark the position of the second hole, remove the fabric and make a small cut for that hole.

4. Pull the fabric over again and stretch it around the edges of the padlock. This will create creases to mark the area in which you can draw/write
5. Draw your sketch, names, date or whatsoever, pull the shackle through fabric again, then cover the front and back of the lock with Mod Podge and flap down the fabric.

6. Cut two slits on both sides of the lock, apply Mod Podge and press down the fabric. Apply more Mod Podge and fold down the rest of the fabric. It's like wrapping a gift.

7. Cut off any excess fabric, apply a generous coat of Mod Podge all around the lock, then hang dry. I used a wooden skewer inserted into a drawer

8. Mod Podge is not waterproof, so once it has dried completely ( after ca. 24 hours) you need the cover the locket with a water-resistant sealant, e.g. Crystal Clear Spray
And that's it!