...Pumpkins scream in the dead of night....
Halloween is no big thing here, hence i don't feel the need to decorate in a Martha-impressing style, even though i love this spooky day. I displayed the usual cheap old stuff and combined it with a few new handmade items. All in all my decoration looks probably more like a kid's creation rather than the work of a skilled adult, but hey, we are not hosting a haunting party or trying to win a scare-the-crap-out-of-you contest.
MisterT and i like it.
The TV shelf serves as our mantle alternative:
The Spoo-Key dinner table corner:
My DIY straw wreath:
I recently rediscovered this very old window dummy hand in my junk box and attached some black plastic halloween nails that i have been keeping for years.
The friendly door witch:
Pumpkin doormat from Ikea:
Little gift for MisterT, a fancy Halloween flashlight that i found on clearance for 10 cents:
Last but not least my "Old Navy" pumpkin socks. I bought them on clearance for 25 cents instead of $5.
Always buy anti-seasonal! Happy Halloween!
Happy Sunday!
The week in review:
1. My "Spoo-Key" Garland was shared on At The Picket Fence's Facebook page tonight. Yeeha, that's super cool!
2. I did not win the lottery jackpot. MisterT did not play. He would have won 3500€ with his favorite numbers *sigh*
3. We had a little fire in our wall. No visible flames but the power outlet cover plate was charred, as well as one of the cables inside the wall. Nothing bad happened except that we had to live without electricity in our living room and bedroom for 36 hours.
4. This little incident finally made me pack our "emergency kit", including our most important documents. A good opportunity to declutter our binders and throw away old bills from 2005...
5. I tried crochet again and of course i failed, again. Crochet is a great craft and I won't give up, but i realized that it's probably wiser to begin with an easier pattern than a beanie hat.
6. I gained too much weight from sitting around all day and none of my trousers fit me anymore. I should stop eating mint-chocolate candy, i really should.
7. Pretty leaves are falling from the trees rapidly now. It's a wonderful season!
1. My "Spoo-Key" Garland was shared on At The Picket Fence's Facebook page tonight. Yeeha, that's super cool!
2. I did not win the lottery jackpot. MisterT did not play. He would have won 3500€ with his favorite numbers *sigh*
3. We had a little fire in our wall. No visible flames but the power outlet cover plate was charred, as well as one of the cables inside the wall. Nothing bad happened except that we had to live without electricity in our living room and bedroom for 36 hours.
4. This little incident finally made me pack our "emergency kit", including our most important documents. A good opportunity to declutter our binders and throw away old bills from 2005...
5. I tried crochet again and of course i failed, again. Crochet is a great craft and I won't give up, but i realized that it's probably wiser to begin with an easier pattern than a beanie hat.
6. I gained too much weight from sitting around all day and none of my trousers fit me anymore. I should stop eating mint-chocolate candy, i really should.
7. Pretty leaves are falling from the trees rapidly now. It's a wonderful season!
Thrift Store Finds
White Wool Scarf, 1€.
Exactly the kind of scarf i had in mind for one of my christmas crafts. Now i don't have to knit that thing myself. Thank goodness!
I LOVE: Save The Veil
Have you ever heard of veil weights before?
I think i know a lot about wedding accessoires, simply from spending way too much time in the blog world and on Weddingbee, but those sparkly little helpers are absolutely new to me.
Pretty magnets prevent your veil from blowing around uncontrolled and can easily be attached and removed without damaging the tulle. The perfect solution for an outdoor ceremony and/ or while taking wedding pictures.
Oh, if only i had known about "Save The Veil" before i got married... :)
![]() |
| Photo by Save The Veil |
![]() |
| Photo by Save The Veil |
I think i know a lot about wedding accessoires, simply from spending way too much time in the blog world and on Weddingbee, but those sparkly little helpers are absolutely new to me.
Pretty magnets prevent your veil from blowing around uncontrolled and can easily be attached and removed without damaging the tulle. The perfect solution for an outdoor ceremony and/ or while taking wedding pictures.
Oh, if only i had known about "Save The Veil" before i got married... :)
![]() |
| Photo by Kristen Wynn Photography |
DIY: Last Minute Halloween Decoration
1. Bats made from an egg carton
I found a great tutorial at Happy Clippings and fell in love with those super cute bats and leaf ghosts instantly.
The Halloween decoration in our living room was finished already but i could not resist making two bats. I spray-painted the egg carton and used a regular office punch, white paper and black marker for their eyes
2. Ghosts made from tissues, chestnuts, wooden skewers, double-sided sticky tape and a black marker to draw their faces.
I found a great tutorial at Happy Clippings and fell in love with those super cute bats and leaf ghosts instantly.
![]() |
| Photo by Happy Clippings |
The Halloween decoration in our living room was finished already but i could not resist making two bats. I spray-painted the egg carton and used a regular office punch, white paper and black marker for their eyes
2. Ghosts made from tissues, chestnuts, wooden skewers, double-sided sticky tape and a black marker to draw their faces.
DIY: "Spoo-Key" Book Pages Halloween Bunting
Total Costs: 0€
Total Time: 15 minutes
Materials:
- Tea & coffee dyed book pages
- Yarn
- Black permanent marker
- Red candle
- Lighter
- Tape
Instructions:
1. Burn the edges of tea- and/or coffee-stained book pages. The best place to do so is by the water-filled kitchen or bathroom sink to avoid fire!
2. Hand-letter the pages. ( I did a Google search to find a nice image that i could use as a model for the skeleton key)
3. Light a red candle and drip some wax onto the pages
4. Crease the top of each page and attach them to the yarn. Fix the paper with a small piece of tape.
And that's it!
This project is linked up to some of my favorite Linky Parties
Fall Decoration 2011
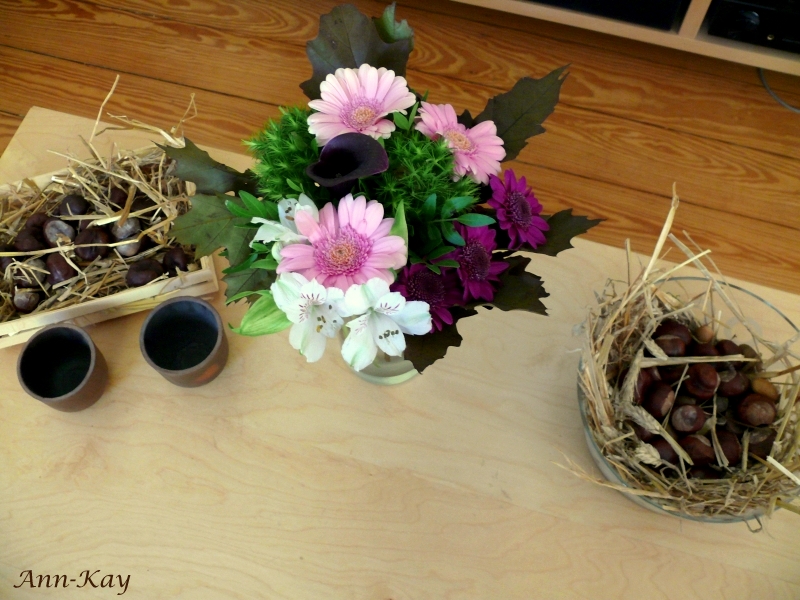
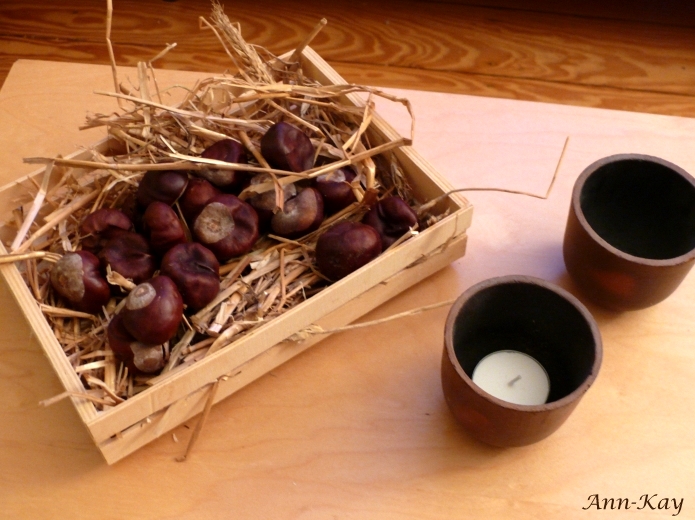
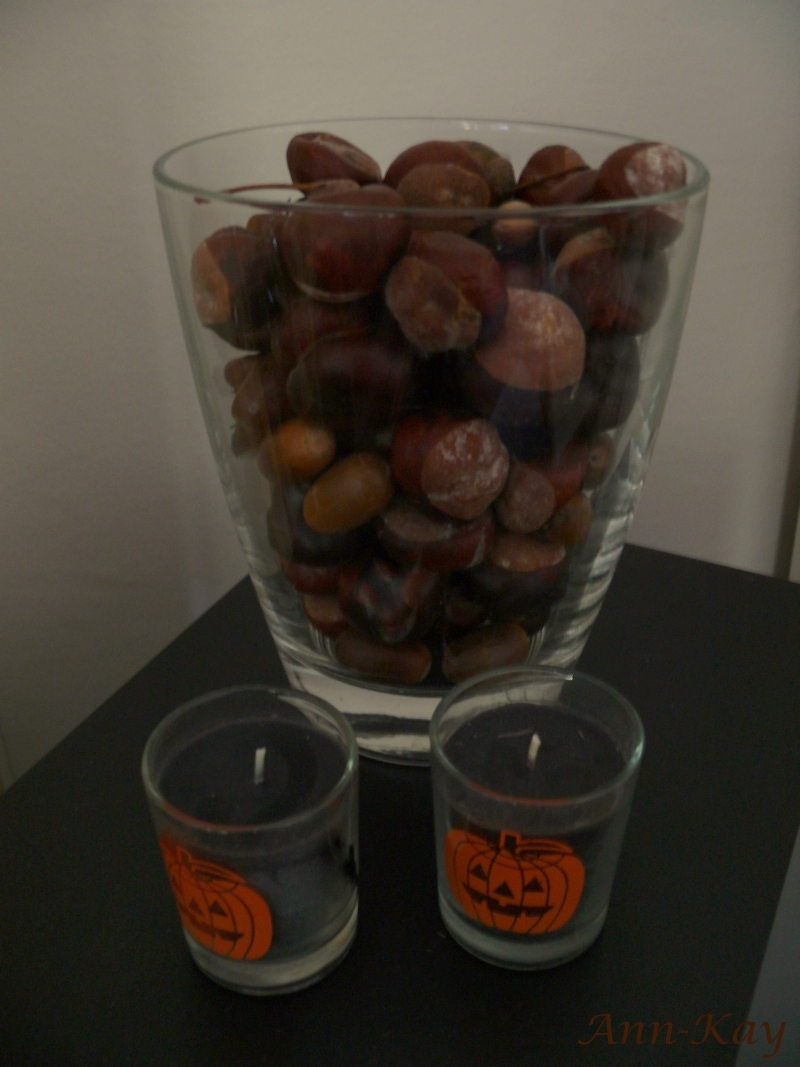
Fall is a great season to decorate with natural elements that can be found everywhere outside. I combined chestnuts, acorns and leaves with items i already had: wooden crates, glass vases, straw,
candles and my new yarn-wrapped bottle.
I really like this decoration, it looks nice, warm and cosy. And it did not cost anything!
But what am i going to do with the rest of the chestnuts??
candles and my new yarn-wrapped bottle.
I really like this decoration, it looks nice, warm and cosy. And it did not cost anything!
But what am i going to do with the rest of the chestnuts??
Fort Lauderdale 1
Back home from Miami we knew we wanted MORE Florida asap, and immediately started planning our next vacation. As much as we loved South Beach, we decided to go to a less crowded, less fancy, more relaxed area and chose Fort Lauderdale. In order to save money and be more flexible we booked a motel suite with a small kitchen instead of a hotel room ( yay and hooray for low rates during hurricane season), an inexpensive rental car with my flight attendant discount, and thanks to our Continental Airlines vouchers we paid $23 or so per ticket, which significantly contributed to making this vacation one of the cheapest ever.
I had just returned from a week in Gambia, and basically stepped from one plane into the other.
Happy Sunday!
A few great things happened this week:
1. My starfish was featured at Completely Coastal
2. My "Mini Bunting Cake Topper" was featured at Hochzeitswahn
3. I received my invitation to the upcoming wedding exhibition
4. I received my Scotch Blue Tape
5. I tried some new craft ideas and they all turned out great
6. MisterT had his last painful dental treatment
7. We have awesome weather. It's bitterly cold but the sun is shining, the skies are clear blue, the leaves on the tree look beautiful and there are still pretty flowers everywhere
Happy Sunday!
1. My starfish was featured at Completely Coastal
2. My "Mini Bunting Cake Topper" was featured at Hochzeitswahn
3. I received my invitation to the upcoming wedding exhibition
4. I received my Scotch Blue Tape
5. I tried some new craft ideas and they all turned out great
6. MisterT had his last painful dental treatment
7. We have awesome weather. It's bitterly cold but the sun is shining, the skies are clear blue, the leaves on the tree look beautiful and there are still pretty flowers everywhere
Happy Sunday!
REVIEW: South Beach/ Miami Vacation 2008 Part III
This post is a collection of random snapshots.
You know, the usual crappy must-have photos that are totally senseless and not really worth watching, yet you take them as a little refresher of all the details that otherwise would fade from memory quickly. It's nice to look at them again a few years later and a huge help to recall the moments.
I am talking about stuff like that:
You know, the usual crappy must-have photos that are totally senseless and not really worth watching, yet you take them as a little refresher of all the details that otherwise would fade from memory quickly. It's nice to look at them again a few years later and a huge help to recall the moments.
I am talking about stuff like that:
Stupid picture but it reminds me of the peppermint ice frappuccino, a christmas special at Starbucks.
DIY: Distressed Canvas
I should continue writing my Reviews but i am in such a crafty mood currently that browsing through thousands of vacation photos seems like a real waste of time.
Ok, so i made this distressed canvas last night. You can see the original photo in my Miami Review ( scroll down, it is one of the last pictures)
I am not going to bore you with another tutorial ( UPDATE: read my tutorial here) , as there are already hundreds of better instructions on almost every craft blog. But i want to mention a few things that are improtant to me:
I came across the first distressed canvas several months ago and have been flirting with the idea of turning one of my beach photos into wall art since then. However, the author of the tutorial emphasized that it would only work with laser printed pictures and Gel Medium.
Now, we only have an inkjet printer. Not a huge problem, i could have my photo printed in a copy shop.
BUT, i do not have access to Gel Medium, or all the other awesome craft supplies that are sold in the United States and used by all the awesome bloggers out there. Think of Mod Podge, Krylon, Martha Stewart, ...
This depresses me everytime i see a great project, and i spend hours trying to figure out a way how to make these things using the supplies i already have, or what i could use as an alternative. I recently found a DIY ModPodge tutorial via Pinterest, and indeed, with the help of comments from all over the world i was finally able to find the equivalent to Elmers Glue, Claq, PVA and whatsoever. Now i know finally how to make my own Mod Podge, yay!
Based on said canvas tutorial mentioned before i was too afraid to try the technique with an inkjet photo- it would have been a massive waste of ink and i would have ruined a canvas. Not good.
I had several conversations with MisterT about alternative solutions and my possibilities, but without success. So i skipped the project, sad and a bit frustrated that there was no option.
Until Gina from The Shabby Creek Cottage published her tutorial. She used an inkjet photo!
I do have something similar to the decoupage she used, but with golden glitter. Um, not the right thing for a beach print. But with my newly learned wisdom about DIY ModPodge i was finally able to make my own canvas!! And and i am ultra happy with the result!
I am not implying that the blogger i referred to lied; she wrote her tutorial based on her experience. But what did not work for her does work for me.
So what i'm trying to say here is that there is never just one option! Not only related to crafts but in life in general. Do not limit yourself by listening to other people. Find your own way and don't just give up based on what someone else tells you. All you need is some creativity, a bit of research and most of all courage. I could have created the canvas months ago but i was too afraid of making a mistake, i was my own stupid blockade for no reason.
Don't let anyone stand in your way! There is an alternative, always!
Ok, so i made this distressed canvas last night. You can see the original photo in my Miami Review ( scroll down, it is one of the last pictures)
I am not going to bore you with another tutorial ( UPDATE: read my tutorial here) , as there are already hundreds of better instructions on almost every craft blog. But i want to mention a few things that are improtant to me:
I came across the first distressed canvas several months ago and have been flirting with the idea of turning one of my beach photos into wall art since then. However, the author of the tutorial emphasized that it would only work with laser printed pictures and Gel Medium.
Now, we only have an inkjet printer. Not a huge problem, i could have my photo printed in a copy shop.
BUT, i do not have access to Gel Medium, or all the other awesome craft supplies that are sold in the United States and used by all the awesome bloggers out there. Think of Mod Podge, Krylon, Martha Stewart, ...
This depresses me everytime i see a great project, and i spend hours trying to figure out a way how to make these things using the supplies i already have, or what i could use as an alternative. I recently found a DIY ModPodge tutorial via Pinterest, and indeed, with the help of comments from all over the world i was finally able to find the equivalent to Elmers Glue, Claq, PVA and whatsoever. Now i know finally how to make my own Mod Podge, yay!
Based on said canvas tutorial mentioned before i was too afraid to try the technique with an inkjet photo- it would have been a massive waste of ink and i would have ruined a canvas. Not good.
I had several conversations with MisterT about alternative solutions and my possibilities, but without success. So i skipped the project, sad and a bit frustrated that there was no option.
Until Gina from The Shabby Creek Cottage published her tutorial. She used an inkjet photo!
I do have something similar to the decoupage she used, but with golden glitter. Um, not the right thing for a beach print. But with my newly learned wisdom about DIY ModPodge i was finally able to make my own canvas!! And and i am ultra happy with the result!
I am not implying that the blogger i referred to lied; she wrote her tutorial based on her experience. But what did not work for her does work for me.
So what i'm trying to say here is that there is never just one option! Not only related to crafts but in life in general. Do not limit yourself by listening to other people. Find your own way and don't just give up based on what someone else tells you. All you need is some creativity, a bit of research and most of all courage. I could have created the canvas months ago but i was too afraid of making a mistake, i was my own stupid blockade for no reason.
Don't let anyone stand in your way! There is an alternative, always!
DIY: Yarn Wrapped Bottle
Today's makeover is so quick and easy that it would actually be exaggerated to call it a 'project': a yarn wrapped bottle.
I had an empty Pernod bottle standing on my desk for a couple of days now, patiently waiting for a good transformation idea. This morning i stumbled upon this pin on Pinterest et voilà , there was said idea.
Total costs: 0€
Total time: 10 minutes
Materials used: empty bottle, yarn, double-sided sticky tape, chestnuts
The look can easily be changed according to my mood or the season, simply by replacing the yarn.
Pretty easy, and budget friendly!
I had an empty Pernod bottle standing on my desk for a couple of days now, patiently waiting for a good transformation idea. This morning i stumbled upon this pin on Pinterest et voilà , there was said idea.
Total costs: 0€
Total time: 10 minutes
Materials used: empty bottle, yarn, double-sided sticky tape, chestnuts
The look can easily be changed according to my mood or the season, simply by replacing the yarn.
Pretty easy, and budget friendly!
The tape arrived!!
I received the ScotchBlue Tape that i won at The Shabby Nest's Scotch Blue Painting Party today!!
You can read my previous post about winning here.
Now i have to figure out the perfect strategy: I want to test it before i turn our hallway wall into a striped dream but i also want to use it sparingly. It's precious :)
I think i will try it on a small canvas first and maybe create an artwork similar to the one Amanda from the Little House on the Corner made.
Can't wait to work with it!!
You can read my previous post about winning here.
Now i have to figure out the perfect strategy: I want to test it before i turn our hallway wall into a striped dream but i also want to use it sparingly. It's precious :)
I think i will try it on a small canvas first and maybe create an artwork similar to the one Amanda from the Little House on the Corner made.
Can't wait to work with it!!
Subscribe to:
Posts (Atom)