Showing posts with label Gift Idea. Show all posts

DIY Hashtag Shirt


If you love DIY ( and i know you do, otherwise you wouldn't be here) you will love this #diy shirt DIY :)
To make this fun shirt, you will need:

- white cotton shirt or top
- acrylic paint
- paint sponge
- vinyl
- Silhouette Cameo ( use storebought alphabet stencils if you don't have a cutting machine)

Colorblock Clay Placecard Holder


Easter is right around the corner. And although we don't actually calebrate, the whole family will be gathered in our home this year, and i am currently planning the table setting and decoration. This DIY requires some time and patience, as you will have to wait for the clay and paint to dry. But it's fun, and i love the result.

QTT Dotted Flower Gift Wrap

Welcome to the first edition of "Quick Tip Tuesday ( QTT)", a new and irregular column where i'm gonna show you how to make the best of a certain situation with next to nothing on hand, except the usual household stuff. All QTT's can be done in less than 5 minutes.

Today i'm gonna show you how to whip up a cute gift in the most unlikely case you forgot someone's birthday and ran out of pretty wrapping paper.


Photo Canvas


One of MisterT's co-workers was lucky enough to celebrate his retirement last week. He threw a big party, and what could be a better gift than a distressed photo canvas?

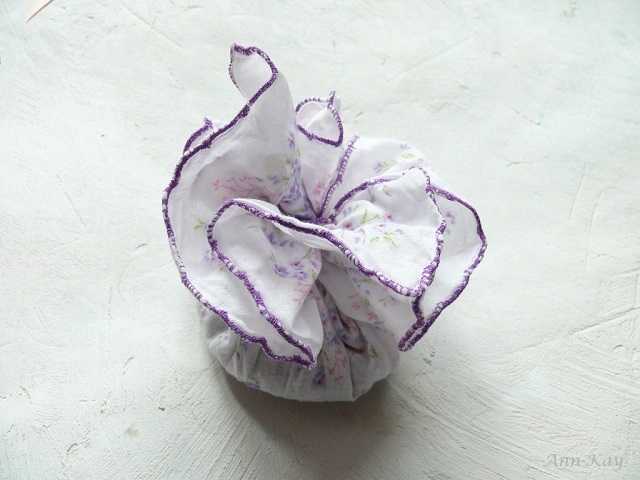
DIY: Easy No-Sew Lavender Bags


These lavender bags are so super easy to make; no sewing required. All you need is a bunch of vintage hankies or fabric, and dried lavender.

Head on over to Pretty My Party where i am sharing the full tutorial.


DIY: Funfetti made from paper scraps


I spent the last few days making dozens of paper flowers, and as always when i craft with paper i end up with a huge pile of scraps. But you know me; i can't bring myself to throw away this pretty patterned junk, so i turned them into "Funfetti" instead.


The cutting process itself is not so much fun and a bit nerve-wrecking, but a few hours and lots of schnipp schnapp schnipp later, i could not be happier with the result of my DIY colorful, fun and eco-friendly confetti.


DIY: Coin Purse Makeover with Paint and Washi Tape Birds


My inspiration was this super cute wallet by Natural Life:

Photo by www.naturallife.com


Sadly, the shop does not ship internationally, so i had to create my own birdie wallet with paint, washi tape, paper and Mod Podge.

Advent Calendar #19 - Monogram Clay Ornaments


These monogrammed clay ornaments/ gift tags are available in my shop here. While it is already too late to order for this year's holidays, why not already think ahead and plan for next christmas? ;)

Advent Calendar #12 - Clay Napkin Rings Tutorial


Materials:
- clay ( Please, always keep our beautiful planet in mind; be an eco-friendly crafter and use air-dry clay if possile. It takes 24-48 hours to dry, but heating up the oven just because you are too impatient is such a terrible waste of energy)
- rolling pin
- toilet paper tubes
- cling wrap ( yeah, not eco-friendly at all, but at least it can be reused to wrap the remaining clay )
- a small kitchen knife
- bamboo skewer
- a bendable surface to work on, e.g. a non-fabric placemat or a flexible baking sheet
- sandpaper

Total time: 
ca. 15-20 minutes for a set of four rings

Total costs:
less than 5€

Instructions:

1. Start by wrapping the cling wrap around the toilet paper tube the way a candy is wrapped. Tuck the ends into the tube


2. For one napkin ring, take a piece of clay twice the size of a walnut. Roll flat with the rolling pin ( ca 3-5mm) on a placemat


3. Cut out a rectangle


4. Use the pointy tip of a bamboo skewer to "write" ( carve) your word into the clay


5. Carefully lift up the piece of clay from the placemat, wrap it around the toilet paper tube and lay aside in a  dry place. Every clay is different, please follow the manufacturer's recommended drying time.


6. Once dry, remove the clay rings from the tube and smoothen the surface with sandpaper. Start with a medium-grade grit, and finish with a fine-grade grit.

And that's it!


P.S. Instead of writing a word, you can leave the surface blank and glue a tiny ornament or christmas embellishment to the ring.
.


Advent Calendar #3 - Gift Tags


Christmas gift tags in red and white, available in my Shop in a set of 5.

Valentine's Tree


My Valentine's day decoration: Three branches in a vase, decorated with tags made of hand-made paper.


Update: My tree won the Plaid Twitter Valentine's Contest, yay!!!

DIY: Coffee Capsules Tree Tutorial

This is the tutorial for the coffee capsules tree i made last week as a christmas gift.


Unfortunately i did not take many photos for two reasons:

1. I never planned on writing a tutorial because i did not expect the tree to turn out that beautiful ( i know, i know, self-praise stinks...)

2. I was in such a flow while working on it that i totally forgot the world around me


Trees like this make great home decoration or wedding reception centerpieces if you decorate them with tealight candleholders instead of the coffee capsules. Spray paint the entire creation in white, black or turquoise for a modern look, light pink for a romantic style or glitter to make it fancy. Instead of paper flowers you could attach fake diamonds, crystals, pearls, butterflies, seasonal fruit or anything else that comes to your mind.


Total costs: 0, as i already had all the materials. Otherwise it would have been approx. 10-15€

Total time: 5-6 hours, plus one night drying time for the Plaster of Paris

Materials:

- a dry branch, not a fresh one! Fresh branches shrink after a while and the tree will become unstable then
- empty tin can ( or a vase or planter)
- plaster of paris + water
- old spoon or stick
- floral tape
- wire
- pliers
- fabric
- hot glue gun
- paper flowers
- coffee capsules
- old newspaper to protect the floor 

Instructions:

1. Fill Plaster of Paris into the tin can ( half-full) and add some water. Not too much, just enough to still be able to stir the mixture ( the thicker the paste the faster it dries) with an old spoon or such. Once the mixture is smooth and lump-free place the branch into the center of the can and hold it for a minute or so, until the mixture is solid enough to hold the branch in its place on its own.
Now let it dry according to the manufacturers instructions. It usually takes about 24 hours to dry completely, but i placed mine near the radiator and could continue working after 12 hours.


2. The next step is to attach the "wire mini twigs". Start by bending a loop at one end ( use one of the capsules as a model to make sure the loop has the perfect size) then twist the wire around itself to prevent the loop from coming open. Now double that length and cut the wire. Just measure by eye, it doesn't have to be the exact same length. Wrap the other end of the wire around the branch and secure it by twisting it around itself. Now it should look somehow like this:


 3. Repeat until you have attached the desired amount of wire-twigs.


4. Up next secure each wire-twig with hot glue. Apply small dabs of glue between the wire and the branch as marked in the photo below and let cool:


5. So far my tree looked like this:


As you can see the wire does not look pretty at all and it makes sense to cover it. At first i tried wrapping it with twine but that turned out to be a nightmare task which would have taken several hours, so i decided to use brown floral tape instead.
Start by covering the wire attached to the branch and then continue to wrap the tape around the wire of the mini twigs, until it looks similar to this:


( I was lazy and skipped wrapping the loops)

6. Up next cover the tin can with a piece of fabric and secure it with hot glue.


7. Lastly, attach the flowers ( or any other embellishments) with hot glue.

I don't have a tutorial for the paper roses because i made them them several months ago and since i create so many paper flowers i can't remember all the details. But you can find lots of tutorials via Google or Martha Stewart.

And that's it!


This project is linked up to my favorite Linky Parties