
We air-dry our laundry on a foldout drying rack in our bedroom. During summer, we take that rack outside, but there's often some heavy wind on our balcony, and clothespins are necessary to prevent the clothes from getting blown away.
We used to have a cute vintage clothespin bag, you know the ones that look like a little dress, but sadly we tossed it when we moved into this apartment, and use a simple cardboard box instead to store the pins. However, the box is really impractical.
We ate cole a few weeks ago, which unfortunately comes in awfully unhealthy and eco-unfriendly plastic buckets. Although we try hard to avoid buying items that come packed in plastic crap, sometimes that's just not possible, and instead of throwing all those boxes and buckets away, I always try to find a new use for them.
When i cleaned up the kitchen and saw the cole slaw bucket, i thought it would make a great clothespins container. It was in desperate need of a little makeover, of course.

But what exactly should i do? Paint it? Podge it? With paper? Or fabric? Bright or neutral color? Stripes or dots? An image transfer like i did with the canvas, cutting board and sugar bowl?
I decided to work up some random items that i had no use for: a tea-stained paper tag, a leftover miscut fabric strip from a backdrop i recently created for a customer, and a mini clothespin. Moreover i wanted to include two tiny pretty flowers from the balcony.

Other materials:
- ink-pads ( yellow, aqua, brown, purple and mauve)
- floral stamps
- Mod Podge
- soft paint brush
- hot glue
- sewing needle and thread
Here's what i did:
1. I distressed the paper tag with the ink-pads
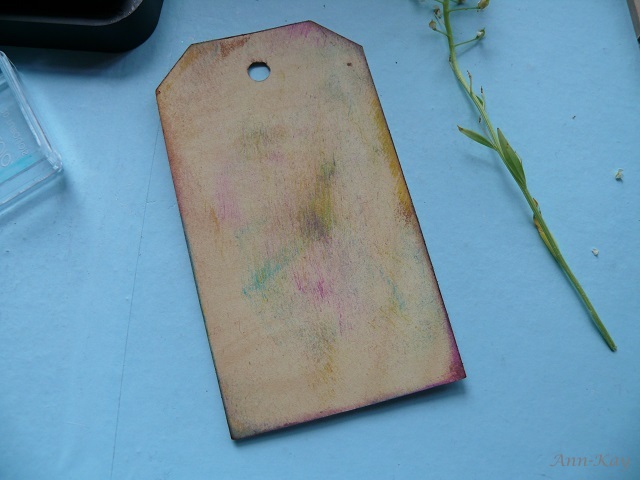
2. I applied Mod Podge to the tag and pushed the two flowers into it. I let it dry for a few minutes, then covered the flowers with lots of Mod Podge and dabbed them down carefully with a soft paint brush


3. While they dried, i distressed the mini clothespin with the ink-pads, and glued it to the tag

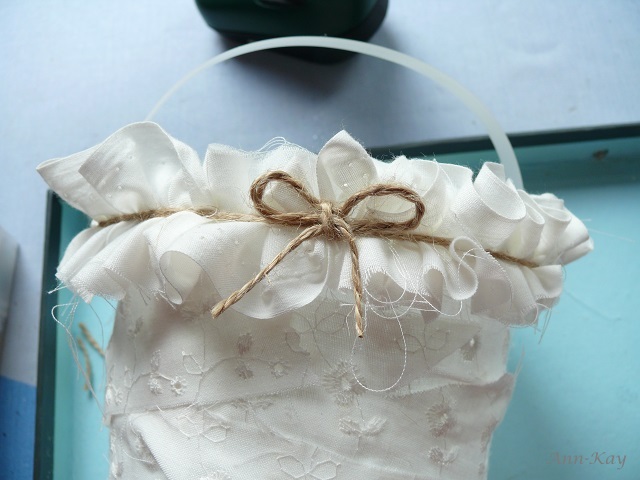
4. Up next, i glued one end of the fabric strip to the bucket, wrapped it around, and attached the other end with a small dab of hot glue.

5. Then i found another strip from the same piece of fabric in my ever-growing stash. It's the ugly selvedge that i had obviously forgotten to throw away. Luckily for me, because a few minutes and countless stitches later i had the perfect solution for covering the bucket's edge: a ruffle trim

6. I used hot glue again to attach the ruffle, and in addition to the glue I wrapped a piece of jute twine around the ruffle, as well as the bottom of the bucket.


7. Then i added a tiny leftover piece of jute twine to the paper tag. It's just for show; the tag is actually glued to the fabric.


And that's it! My DIY clothespins bucket.

The style is totally different from what i usually create, but sometimes i'm in the mood for trying something new, and i really like the result. And wouldn't this be such an adorable flower girl basket for a rustic/ shabby chic wedding?
