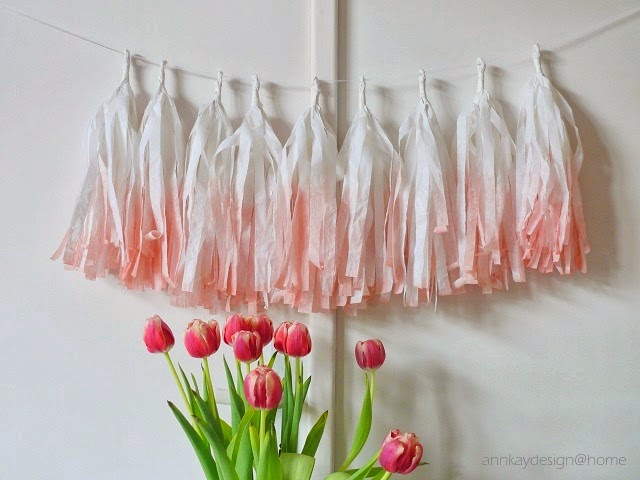

Today i show you how to make a watercolor dip-dye tassel garland, and create a unique look in your favorite color to match any room or party theme perfectly.
The possibilites are endless, and you can either hang the garland horizontally, vertically or use it as a ballon tassel.
Materials:
- white tissue paper ( one sheet makes one tassel)
- acrylic paint
- water
- bowl or plate
- clothespins
- scissors
- masking tape
- twine or ribbon

Instructions:
1. Fold one sheet of tissue paper in half, fold it again, and repeat one more time so that you end up with eight layers. To prevent the layers from slipping, secure the folded edge with one or two clothespins.

2. In a bowl ( or plate, or bucket), mix acrylic paint with water. The exact mixture ratio depends on how strong you want the colors to be. I wanted to create a watercolor look, and mixed 1 tsp paint ( a combination of pink, orange, and cream) with 1/4 cup of water. For a darker result use less water.
3. Dip one half of the sheet into the mixture.

4. Let it drain shortly, then hang to dry. I used my old wooden ladder, but a regular drying rack will work fine, perhaps even better. Just make sure to protect the surface underneath in order to avoid paint splatters on the floor.
Let the sheets dry completely. If you are not happy with the color, simply repeat the dyeing process.

5. Once the sheets are dry, it's time to cut the tassels.

Cut strips towards the folded edge, but leave 1-2 inch uncut

6. Remove the clothespins, unfold the paper and spread the layers carefully. Make sure they overlap

7. Now roll up the uncut middle part of the layers, and twist.


8. Cut tape into small strips of 1-2 inch and wrap it around the twisted part of your tassel.


9. Thread the tassels on twine or ribbon

And that's it! Your garland is ready!


