Our Easter Anniversary

MisterT had those easter treats hidden for me


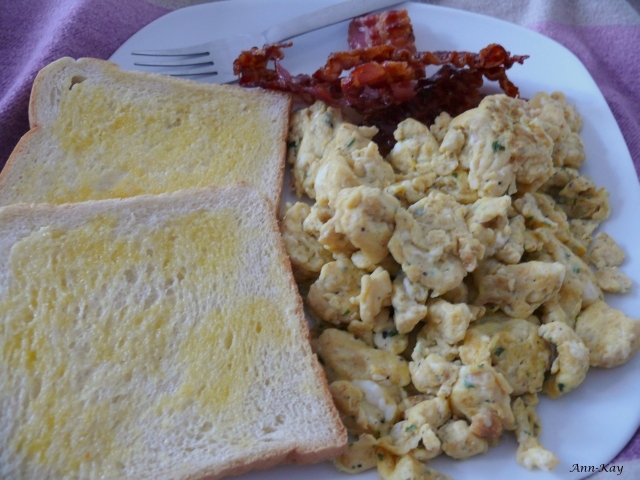
We started the day with breakfast in bed.

Then we went for a walk and took a photo with a funny turquoise-white striped "1", our new anniversary tradition. I already decided that the next number will have polka dots.


I made a love birds "love lock" to hang onto our favorite bridge. Of course i did not make the actual padlock, but i embellished it with Sparkle Mod Podge and hand-painted fabric with our initials and wedding date. This probably won't last a lifetime, but perhaps we will turn it into another tradition to hang a new lock each year.


Back home we ate ( too much) chocolate cake and spent the rest of the evening on the couch with a few episodes of "Chuck" and the best homemade Chili ever.


The paper gift: A mini coupon booklet in addition to a card. I like giving coupons and had these cute templates pinned from the blog Carrots And Brokkoli.


And a few more impressions from a beautiful but windy and terribly chilly day:


One of my favorite houses. It's turquoise.

Happy...

... 1st Anniversary to me and MisterT!


And Happy Easter to everyone else!


This has been such a hard year career-wise and as a consequence financially. This was in fact the worst year we ever experienced as a couple. Some people say the first year of a marriage is the hardest, some say the seventh year is cursed.
Both sayings are probably true and in our case the first year of marriage happened to overlap the seventh year of our relationship. With both being left behind now, i am confident that things will be better real soon. We still struggle tremendously, but there is a light at the end of the tunnel and guess what happened this week?

MisterT won two flight tickets to France!! Well, technically i won ( um, again...) because the contest submission form was filled out on my laptop. But no need to nit-pick.
So now we can enjoy two city trips as soon as our monetary situation gets better. I told my parents to sign up too, because obviously not a lot of people are participating in that monthly contest and chances are good they will be selected in one of the next drawings. Too funny!

We're off to celebrate and I'll leave you with a few wedding impressions. I can't share the pro pics yet, so these are some non-professional snapshots ( quite obviously).

Obtaining the marriage license:


A fun gift. Somehow we got into collecting rubber ducks during the years.


Taking informal formals:


A fabulous self-portrait as the first photo on the first day of our marriage ( note to myself: backlit shots don't make much sense):


Waking up to the sound of the waves and a gorgeous ocean view.


 Married!


P.S. I have prewritten this post because i don't want to sit in front of the computer on our actual anniversary. So let's pretend today is already Sunday.

Anniversary SALE

+++SALE+++SALE+++SALE+++SALE+++SALE+++SALE+++SALE+++SALE+++SALE+++SALE+++SALE+++

Come celebrate with me! In honor of my first wedding anniversary all ready-to-ship bridal bouquets in my Etsy Shop will be marked down 20% from April 8th to 14th


Thrifty Finds

Ribbon, tons of ribbon, 10 cents each! Some even for 5 because the sales person thought 10 is too much for a small piece of ribbon. Mind you, i bought them in a normal retail store and not a thrift store or flea market. That lady was too cute.


And a few days ago i found a pretty frame that will soon be turquoise, another wooden "Beach House" sign ( dito on the turquoise) and something else, but i can't remember what it was...


MisterT and i are celebrating our first wedding anniversary next sunday, and still have no idea how to spend that day.

Our actual plan was to fly to Warsaw ( i won the trip) and spend the entire weekend in a luxury hotel. Well, that was before we realized that our anniversary would be on Easter Sunday and to be honest, easter in one of the most catholic countries doesn't sound like heaps of fun. I mean, we are no party people but exploring a new city doesn't make much sense when all the shops and restaurants are closed and everyone is either in church or sitting at home with their families.

Then i thought with spring finally being here why not have a picnic instead. I already made some meal plans and imagined how we would sit on a blanket and enjoy the sunshine. A wonderful and inexpensive idea, until yesterday, when all of a sudden we were hit by a short snow storm and now the temperatures are back to winter mode again. Gnarrrrr.

So now we have less than one week left and still no plan. MisterT says he wouldn't mind if we invited my parents to spend the easter weekend with us, but i don't want that. I would agree if it was our second or third anniversary, but this is our first, last and one and only "1st anniversary" ever and i want this day to be special.

By the way, in honor of this day i am having an Anniversary Sale in my Etsy shop with 20% off all finished bridal bouquets. I assume most of you are already married, but i thought i'd let you know just in case anyone knows someone who perhaps knows someone else who needs a bridal bouquet.

DIY-Tutorial: Bridal Bouquet Preservation Artwork #2

Here's another tutorial about how to turn your wedding flowers into an individual piece of artwork.


Materials:

- dried bouquet ( this time i used yellow tulips)
- paint brush and sponge
- acrylic paint in turquoise, yellow, red and green
- Mod Podge ( or similar)
- large sheet of paper matching the size of the bouquet ( or a canvas)


The best way to dry tulips is to just let them sit in the vase until the blossoms are completely dry. Pay attention to the water though and pour away when it turns dull, otherwise it might mold.

1. To create a contrasting background, mix blue acrylic paint with a drob of water, dunk in a paintbrush and splash the paint onto the paper/ canvas. No need to be precise, just feel and act like a five-year-old again, whee!

2. Let dry, then use a sponge to cover the entire surface with Mod Podge.


3. Now carefully place the bouquet on top of the paper and immediately press it down with a flat and solid item. Smart people use a book, unprepared dummies grab the next best thing they can find ( e.g. a paint brush package).
Make sure all the petals get in contact with the Mod Podge


4. Up next, dab the flowers with Mod Podge. It is important that all the petals keep sticking to the paper/ canvas, otherwise they will fall down once you hang your piece of artwork.


Let dry completely for ca. 1-3 hours. In the meantime, wash your sponge and paintbrush.

4. Now you can paint the flowers.
Mix different hues to achieve a vivid and more realistic look. In addition to yellow i applied a red color to make my flowers look like parrot tulips.
For the stems, start with a dark green and put some highlights with a brighter shade.


5. Again, let the paint dry completely.

6. As a final step, insert the sheet of paper into a glassless frame and hang it up.


And that's it!


WHOA, what an AWESOME way to start the day!
My fun Button Ring Bowl made it into the Etsy Weddings Newsletter tonight!!!!!!


Custom Order: Bouquet Charm

The customer purchased this personalized bouquet charm as a gift for the bride, and so i could not resist to include a handmade gift box. My husband jokingly asked me if i knew that this is totally inefficient from a financial point of view. Yep, i know, but i just love making those things and thinking about how another person receives my mail, opens the envelope and then smiles or even squeals of joy makes me happy!


Working on...

This week i am working on a custom order of 100 fabric flowers. The bride wants to attach them to her wedding gown to create a unique and vintage inspired one-of-a-kind style.
I adore this idea!

FEATURED!!!!

Remember back in January when i mentioned my preparations for my parents' anniversary surprise party?
I haven't posted any photos of the party yet beeeeecause... i submitted it to Hostess with the Mostess and it got FEATURED today!!!

Man, i am so excited to see my tiny event over at this amazing and inspiring super-blog!!! Even more so because i basically created everything out of nothing and materials i already had.

to see the feature

and 
to see all photos


And a photo of me hanging up those giant paper flowers:


DIY: Another Vase Makeover

Dark blue is so not my color, but IKEA had those vases on sale a while ago and two of them went home with me. One got a makeover today, the other one is still waiting for a brilliant idea.


I used a turquoise Edding and instead of spray paint a white acrylic paint that is at least ten years old and because of its age mostly dried out and crumbly, but i think that gives it an interesting texture.
The flowers are made of recycled plastic.

DIY: Vase Trio Makeover


I finally managed to restyle those 10-cents vases. At first i gave them a coat of white spray-paint, which looked quite nice. But as much as i enjoy all-white decor and furniture, this is just not the kind of interior i want to live with.

I need color in my life, lots of color, and most of all my favorite colors: turquoise and yellow.
So  i decided to transform the vases into something colorful, fun and imperfect instead. I'll probably repaint them in a few months, but for now i totally like that style.

The decoration is from last year: Billy Balls made of modelling clay, and denim roses

DIY: Dried Flower Canvas #2 - Tulips

Here's another tutorial about how to turn a dried flower bouquet into an individual piece of artwork.


Materials:

- dried tulip bouquet
- paint brush and sponge
- acrylic paint in turquoise, yellow, red and green
- Mod Podge ( or similar)
- large sheet of paper matching the size of the bouquet ( or a canvas)


The best way to dry tulips is to just let them sit in the vase until the blossoms are completely dry. Pay attention to the water though and pour away when it turns dull, otherwise it might mold.

1. To create a contrasting background, mix blue acrylic paint with a drob of water, dunk in a paintbrush and splash the paint onto the paper/ canvas. No need to be precise, just feel and act like a five-year-old again, whee!

2. Let dry, then use a sponge to cover the entire surface with Mod Podge.


3. Now carefully place the bouquet on top of the paper and immediately press it down with a flat and solid item. Smart people use a book, unprepared dummies grab the next best thing they can find ( e.g. a paint brush package).
Make sure all the petals get in contact with the Mod Podge


4. Up next, dab the flowers with Mod Podge. It is important that all the petals keep sticking to the paper/ canvas, otherwise they will fall down once you hang your piece of artwork.


Let dry completely for ca. 1-3 hours. In the meantime, wash your sponge and paintbrush.

4. Now you can paint the flowers.
Mix different hues to achieve a vivid and more realistic look. In addition to yellow i applied a red color to make my flowers look like parrot tulips.
For the stems, start with a dark green and put some highlights with a brighter shade.


5. Again, let the paint dry completely.

6. As a final step, insert the sheet of paper into a glassless frame and hang it up.


And that's it!


This project is linked up to my favorite Linky Parties